Hi everyone!
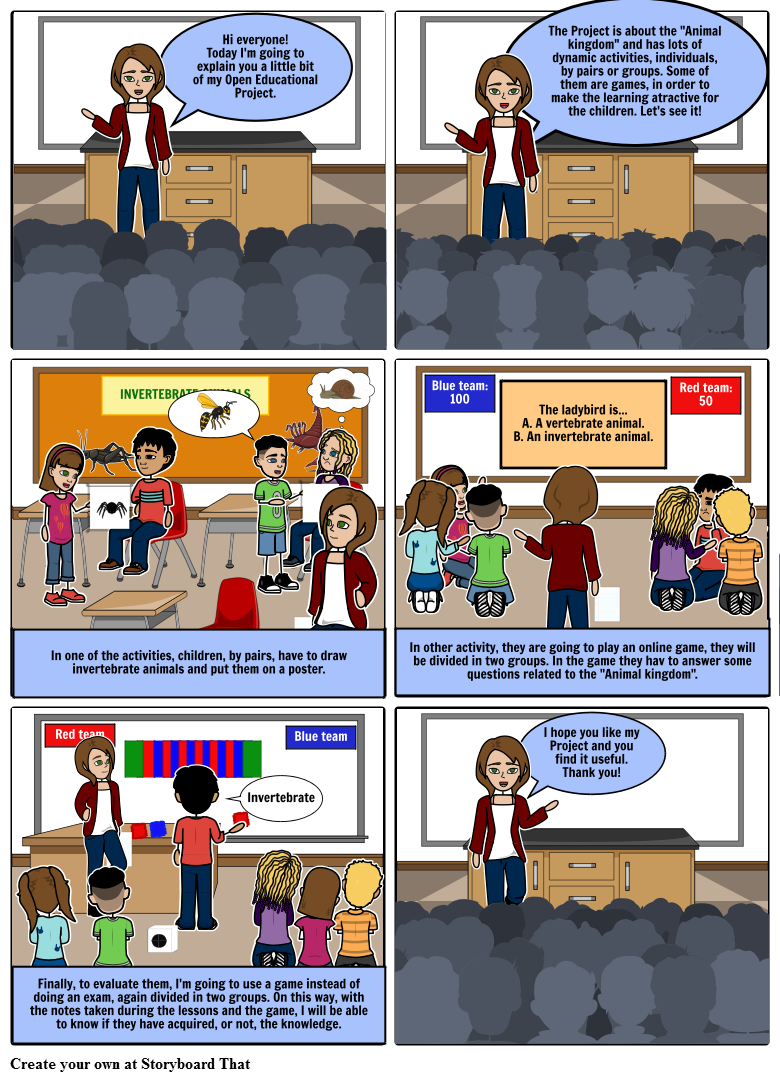
The Project that I have made, is for a standard class of second grade without any problem, but if we have any child with special needs, we can adapt it. We have to take into account also, the necessities and personalities of our children, to modify the content and the activities for them. I have used also visual support to make it easier to understand and more atractive for the children. You can see here a short presentation made with StoryboardThat.
Made with Storyboard That
3. Self-reflection and conclusion
If you have any doubt or you have tried it, leave a comment. I hope you like it and you find these tools useful.
Last day, I showed you a deep analysis of an Educational Project and today, I am going to show you my Project Prototype.
First, I want to explain how I have created my Project and later, I am going to tell you some descriptions about it.
1. Creating my prototype:
1. Creating my prototype:
First of all, I have completed a template to have a first approach to the Projet (what is my Project about, the aims, the roles of the children and the teachers, the methodology and so on). I am going to upload it for you with a new tool called Issuu. This is an online tool that allows you to upload documents and create new ones by using different formats and it is easy to use. I have taken the template from my university URJC's Aula Virtual:
This could be difficult to do because you have to think, before doing it, about your Project and the final result that you want, and also, because I want to improve children's knowledge by using games, songs and other funny activities to motivate them. On my Project, as I said before, games and songs are going to have an important role, this is because it helps them to acquire the knowledge easier and to achieve the aims. I decided to focus my Project on the "Animal kingdom".
In addition, this Project is going to follow a cross-curricular line with other subjects. The Project is for Natural Science, but there are other subjects connected like Physical Education (where they can make some exercise related with the animals), Music (where they can hear some animals' songs) or Arts and Crafts (where they can create some posters related to animals).
When I finished, I started designing a short presentation to show you my Project. I have made it with StoryboardThat, in order to show you a new interesting tool. This is an online tool so useful to make stories or comics. I have chosen it because it is more atractive for children if you explain the content with this tool, or they can use it to make their own comics.
2. Creating my prototype:
To create my prototype I have followed the next structure:
- Title.
- Students level.
- Number of sessions.
- Areas.
- Teachers' and students' roles.
- Aims.
- 4Cs of CLIL.
- Key competences.
- Skills.
- Resources.
- Setting.
- Challenges.
Here you can find my final prototype. To make it, I have use again Issuu, but with the document modified.
The Project that I have made, is for a standard class of second grade without any problem, but if we have any child with special needs, we can adapt it. We have to take into account also, the necessities and personalities of our children, to modify the content and the activities for them. I have used also visual support to make it easier to understand and more atractive for the children. You can see here a short presentation made with StoryboardThat.

Made with Storyboard That
3. Self-reflection and conclusion
What I have learnt is how to use different online and free tools to make the activities and explanations more atractive and funny for the kids. We have lots of easy new tools that we do not use, maybe because we do not know them, but from now on, I am going to use them in my lessons.
I have realised that it is not easy to design a Project because we have to take into account different elements and when you do it with the children, they can make different things that you do not expect, so you have to be prepared for everything.
As I said at the beginning of this post, I like to motivate the children to learn new things, so I consider crucial to adapt the content that we have to teach by using these new tools that are so creative and interesting, in order to make the lessons more interesting and dynamic.
If you have any doubt or you have tried it, leave a comment. I hope you like it and you find these tools useful.
No comments:
Post a Comment